Replacing Rear Seat Knob and Shaft
(Subaru Baja)

5th day in a row of using the switchback! Just gonna flip the rear seat back an...
*snap*
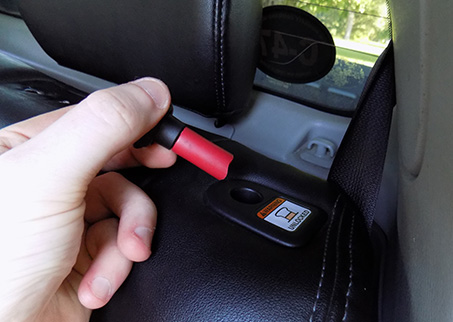
So the knob shaft that links the actuator hook to the knob snapped clean off, and after an exhaustive internet search it appears I am one of the rare few to have this problem. Okay no big deal let's just look at the FSM on how to replace it...
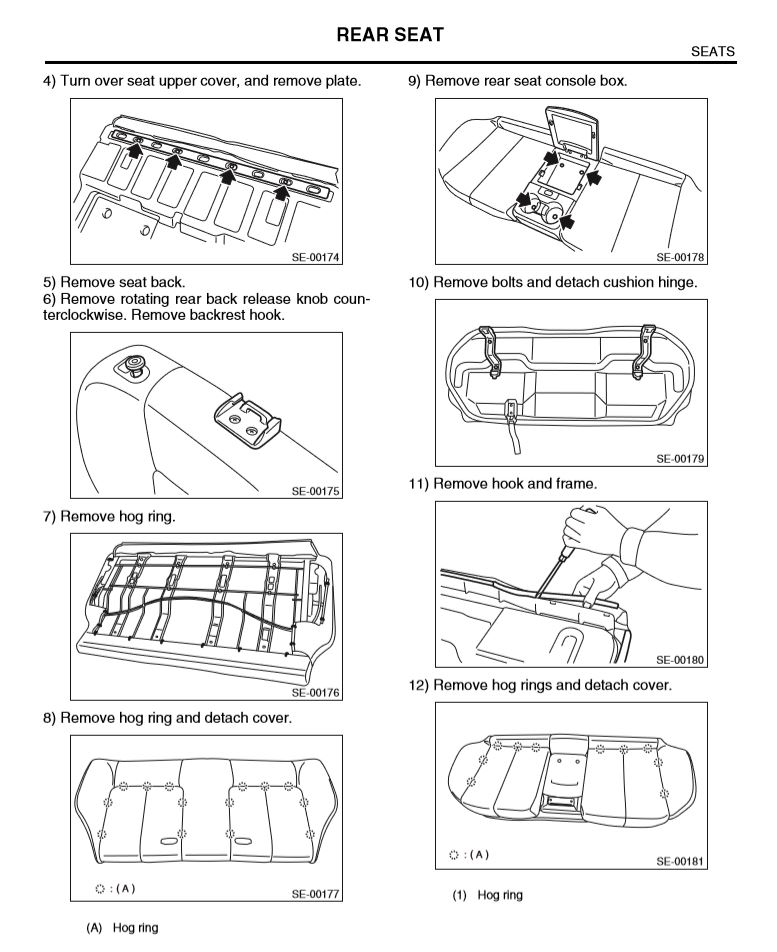
The FSM only has instructions on how to take the plastic cover off and no internal parts. Fantastic. Okay, let's try to find a part number on the unbroken piece from the other side... and there's no part number. Fantastic. Okay, let's look at the parts catalog and see if we can buy one off Subaruparts.com...
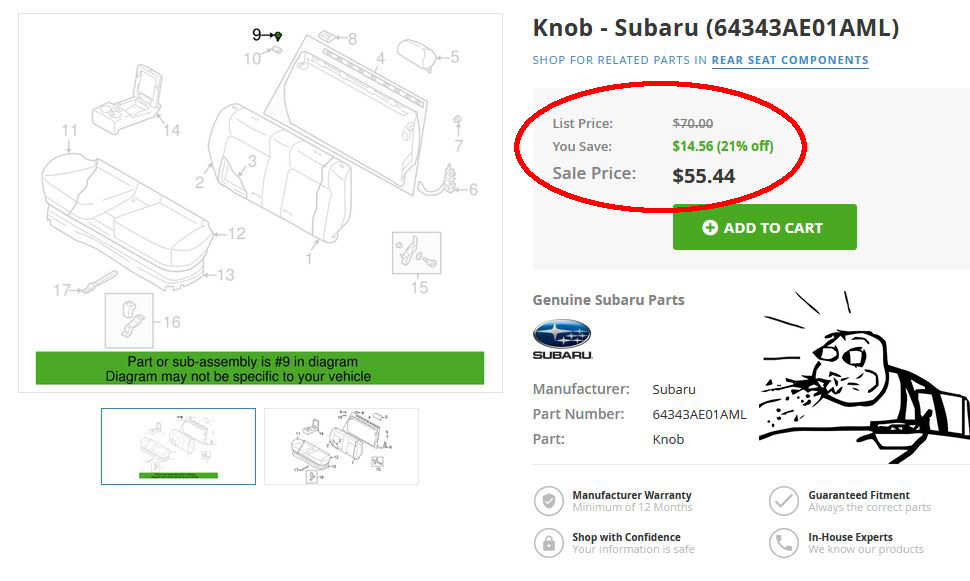
WHAAAAAAAAT. And that's just the knob, not the shaft. Well, the shaft is probably 10x more, so we're now going to Plan C...
So, here's a guide to building a new shaft since there doesn't seem to be any help out there on this issue other than converting your Subie into a 2-seater... or if you just want custom knobs.
Step 1:
First, we need to get to the old parts out of there. Follow the FSM on how to disassemble the rear seat cover (http://jdmfsm.info/Auto/Japan/Subaru/Baja/2006/USDM%20Legacy%20FSM%202006%20(BT%20Baja%20only)/BODY%20SECTION/SEATS.pdf). You may need an impact driver to loosen the bolts.
Step 2:
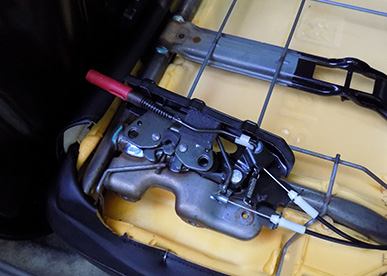
Next we'll need to remove the locking mechanism off the seat so we can get the broken part off. Unscrew the two 12mm silver bolts on the side of the mechanism. You may need to use quite a bit of force as mine were torqued on VERY tight.

Step 3:
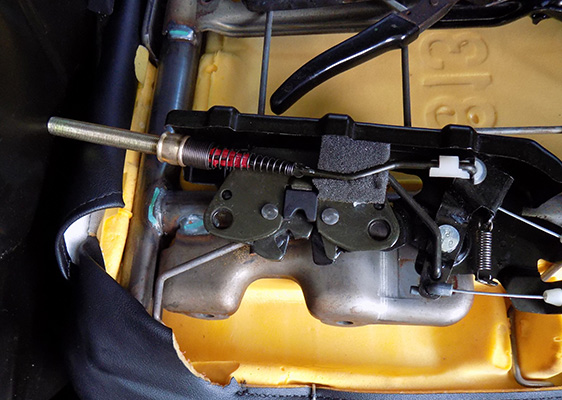
Now that the locking mechanism is free, wiggle it out from the foam and gaze upon its complexity (or lack thereof). (note that I used the unbroken one in this pic)
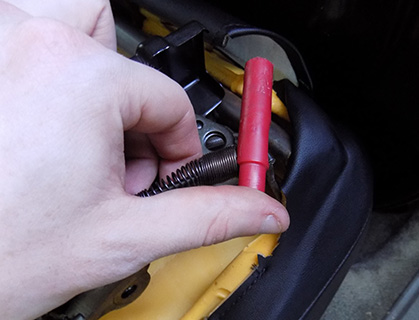
Step 4:
Now we need to remove the broken shaft (the red plastic piece) from the actuator rod. It's held on just by a tension spring and a small 90-degree hook. Simply pull down the spring and twist the shaft 90 degrees in the opposite direction of the hook and pull it out. (note that I used the unbroken one in this pic)
Step 5:
Now that the busted shaft is out, we need to replace it with something that mimics it. First thing and easiest I thought of was wood.
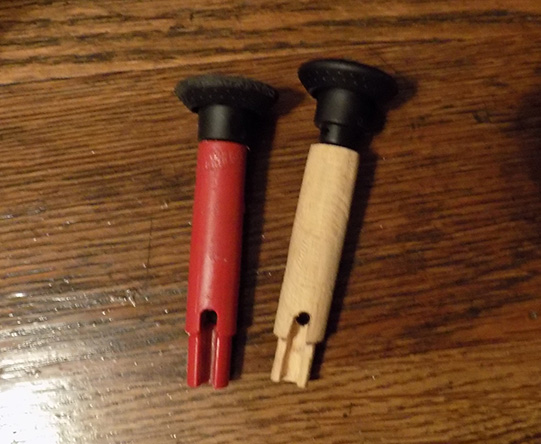
...but I doubt that even a piece of oak will hold over the next 10 years, so we have to move to something stronger... METAL
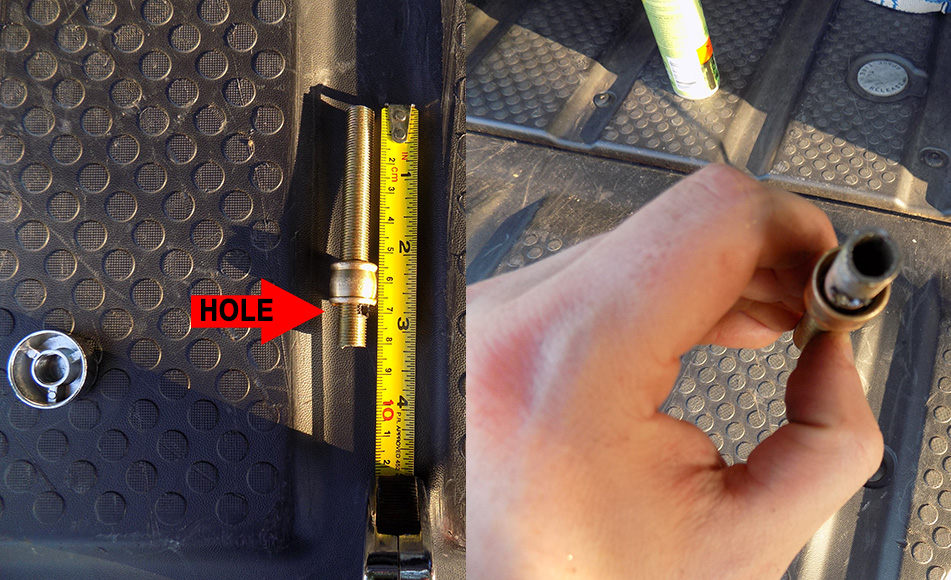
I ended up going with a 3/8in diameter x 3 & 3/8in long piece of hollow brass lamp pipe for the shaft, along with a 1/2in diameter x 1/2in long connector to hold back the spring (note the connector I used has a larger diameter end toward the bottom, this is to hold the top of the spring inside but is entirely optional)
You will need to drill approximately a 1/8in hole about 1/2in down the shaft. This is where the hook will grab onto.
Step 6:
Now this pipe will not stay securely on the rod, so we need to brace it so the hook doesn't wiggle out of the hole. I used some plastic wall plugs I had lying around and shoved them over the top of the rod.
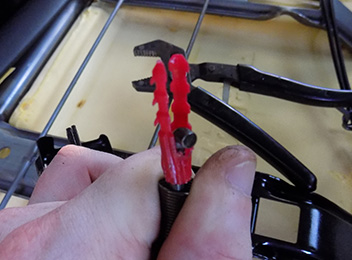
Step 7:
Now attach your redneck latch shaft onto the hook and shove the wall plug into the pipe so the hook has little to no wiggle room. Tension from the spring will keep it (somewhat) in place. Next, let the spring go over the bottom of the shaft and rest against the connector piece/stopper (note that I used a threaded connector and partially screwed the top of the spring into it, entirely optional)
Step 8:
Now all that's left is to shove the top of the shaft through the hole in the top of the seat, test the lock, and finally reassemble everything back in place. I chose silver end caps for the knobs.

And with that you're all done!

NOTE: With this setup the threads on the pipe grab onto the sides of the plastic top of the seat. I'll get some smooth connector nuts and just put them over the threads. It is entirely optional to use a fully-threaded pipe, but this was the best they had at my local hardware store.
Optionally you can also use a 1/2in diameter x 3in long double-female threaded pipe or 1/2in diameter x 1in long bolt joint with 3/8in hollow male pipe at the bottom to hold the spring and put on whatever knobs you want at the top.